Gluten-Free Pizza Dough Recipe
Apr 09, 2015 in pizza, vegan, gluten-free, vegetarian, main course, sandwiches, legumes, beans, chickpeas, brown rice.
The pizza crust is made with brown rice and chickpea flours, coming together in a snap. Proof yeast, poor yeast into dry ingredients, mix in remaining wet ingredients, stir to incorporate. You can even knead it like I’m doing in the photo below, but I just did that for the camera––you don’t need to knead gluten-free pizza dough (I do a little bit, just for authenticity’s sake).
When everything is amalgamated, grease a large bowl with olive oil and gently place you sleeping pizza dough baby in the bowl, rolling around to coat. I like to gently “spank†the dough at this point, because I like the sound it makes, but that’s up to you––entirely optional. Present your dough to the camera like I’m doing in the photo below and congratulate yourself on being a gluten-free baking deity. Then, place a kitchen towel over top and let it rise at room temperature for a couple of hours (or leave it out for an hour and pop it in the refrigerator overnight for a nap).
After you’ve awoken your pizza dough baby, it’s time to get rolling. Over the last decade of gluten-free baking and cooking, I know just how delicate the doughs can be. They don’t perform the way “regular†bread dough does, which is precisely why you have to roll this instead of stretch it (as there is no gluten to stretch, for the food science folks out there). I find all gluten-free pizza doughs (homemade and purchased) similar to Chicago deep-dish pizza dough this way.
At this point, don’t shy away from keeping it rustic, something my sister affectionately refers to as “Jamie Oliver Style†(it’s really just excusing you from a messy-looking final product, which I find rather liberating). If you’d like to see the ultimate Jamie Oliver example of his eponymous “Jamie Oliver Style,†see: here.
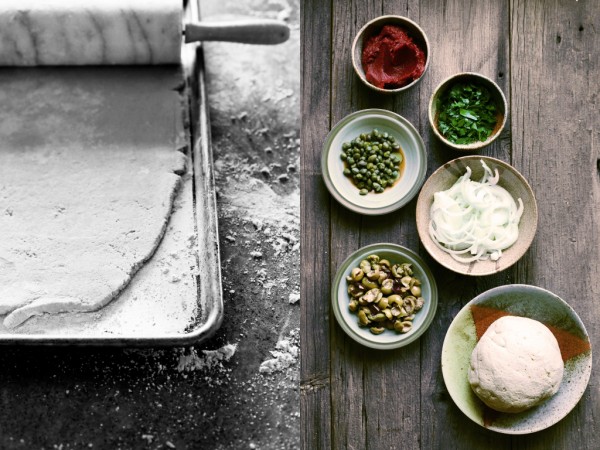
I recommend finishing your dough rolling directly on a very large baking sheet. Just be sure to sprinkle plenty of extra flour or cornmeal down first as it’s fairly tacky, much like a pie dough.
Now the fun part: time to decorate your steamrolled dough baby. I’ve chosen a simple combination of puttanesca-inspired ingredients. If you’d like cheese on your pizza, now’s the time to get milky.
After baking for 25 minutes in a ferociously hot oven, the bottom gets gorgeously tanned and crisp, like it’s just returned from a winter getaway in the Bahamas. Before you know it, you’ve got yourself a gluten-free pizza. Now, give yourself a pat on the back and dive in.
I won’t claim that this tastes just like regular pizza dough, but I think it can still stand on its own and not be just “alternative†for those who can’t normally enjoy it. Truth be told, if I was making this just for me, I would add some snowy mozzarella or dollops of plush ricotta.
For those who can’t normally eat pizza due to a food intolerance or allergy, I hope you find comfort in this sheet pan full of crunchy, hot, doughy, carby goodness. And, if you can eat pizza but are looking for something tasty, different, whole grain, and plant-based for dinner, like me, you can join in and eat it too. Pizza, no matter its label, should always be celebrated.
To sum up: gluten-free pizza > no pizza.
2 Hours 15 Minutes
2 Hours 15 Minutes
Makes 1 large pizza
Category: Main Course, Pizza
- ½ cup warm water
- 1 tablespoon + 1 teaspoon quick active yeast
- 1 tablespoon maple syrup or sugar
- 2 cups brown rice flour
- 1¼ cups chickpea flour, plus more for rolling
- 1 teaspoon sea salt
- 1 teaspoon xanthan gum
- 1 cup fresh water
- 1 tablespoon extra-virgin olive oil, plus more for bowl
- Make the Pizza Dough: In a medium bowl, combine warm water, yeast, and sugar. Proof for 10 minutes until foamy.
In a large bowl, combine flours, salt, and xanthan gum. Mix in proofed yeast mixture, fresh water, and oil. Stir until combined (dough is very sticky).
Grease a large bowl with oil, add dough, rolling around to coat in oil. Cover with a kitchen towel and leave at room temperature for 2 hours. Use immediately or refrigerate until ready to use (overnight works). - Roll the Pizza Dough: If the dough is too sticky after resting, knead in ¼ cup extra chickpea flour. Flour a clean counter with chickpea flour and begin to roll dough using a floured rolling pin to form into a rectangle about 2-inches high.
Flour a large baking sheet liberally with chickpea flour. Carefully transfer dough to baking sheet (a pastry scrapper or metal spatula are helpful). Roll until ¼-inch in thickness, stopping to coat with more flour, as required. Dough is now ready for use in your recipe; bake according to recipe's instructions.
Allergy Information: Dairy-Free, Egg-Free, Gluten-Free, Nut-Free, Soy-Free, Vegan, Vegetarian
Allison Day
I'm the cookbook author of Whole Bowls (Spring '16) & Pumpkin (Fall '16), creator of the food blog Yummy Beet, and a nutritionist. My recipes are vegetable-focused using accessible, real-food ingredients.


